
- Conversion tracking
- Commission based on order amount
- Track affiliate coupon code conversions
- Supports lifetime commissions
- Track order currency
- Auto-handle recurring commissions
- Auto-handle refunds and disputes
Note: This guide only covers Shopify Online Store. Other sales channels such as “Buy Button” and ReCharge are not supported.
Shopify App Store!
You can view our instruction video on how to integrate through app installation or follow the written guide below the video.
Embedded content: https://www.loom.com/share/6b4066b68eef48649abcab1f2f7c21d7
Step-by-step integration guide
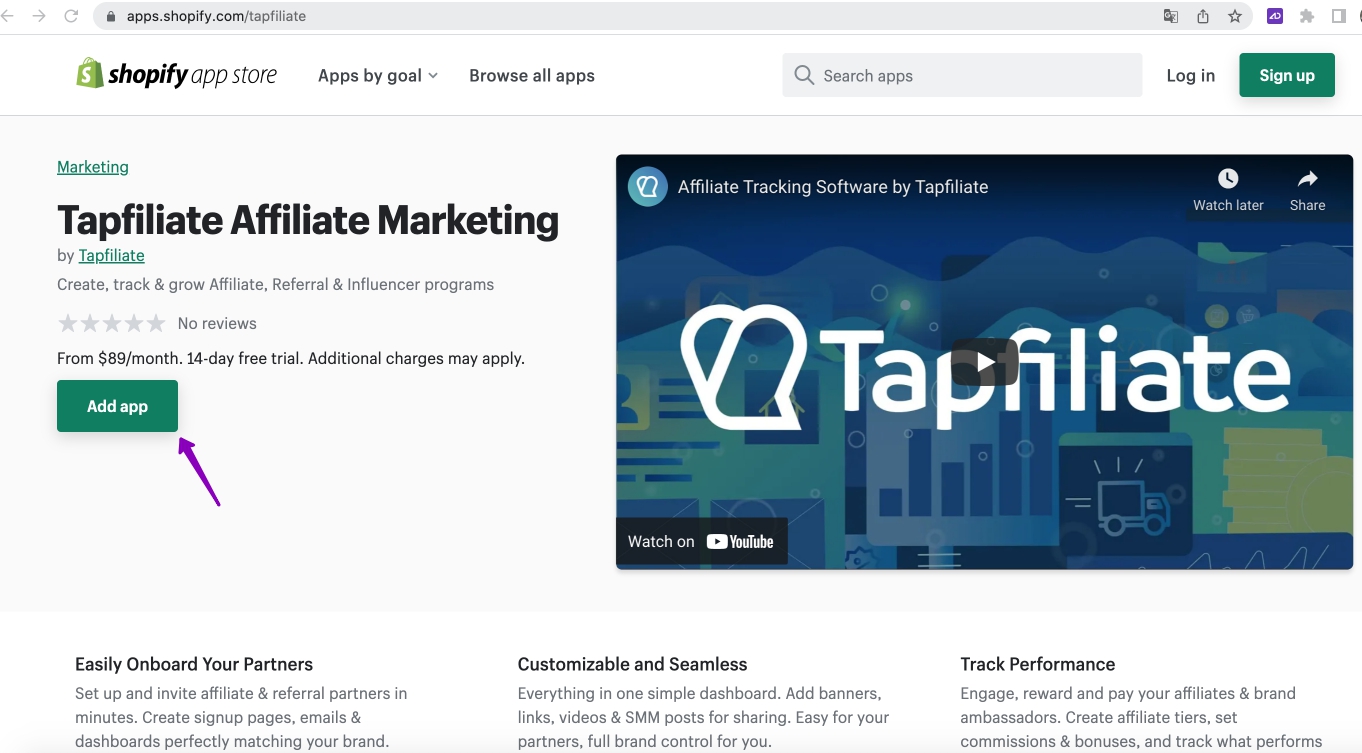
Go to Tapfiliate’s app page in Shopify’s app store, and click Add app.
You’re asked to either create a new Tapfiliate account or link to an existing account.
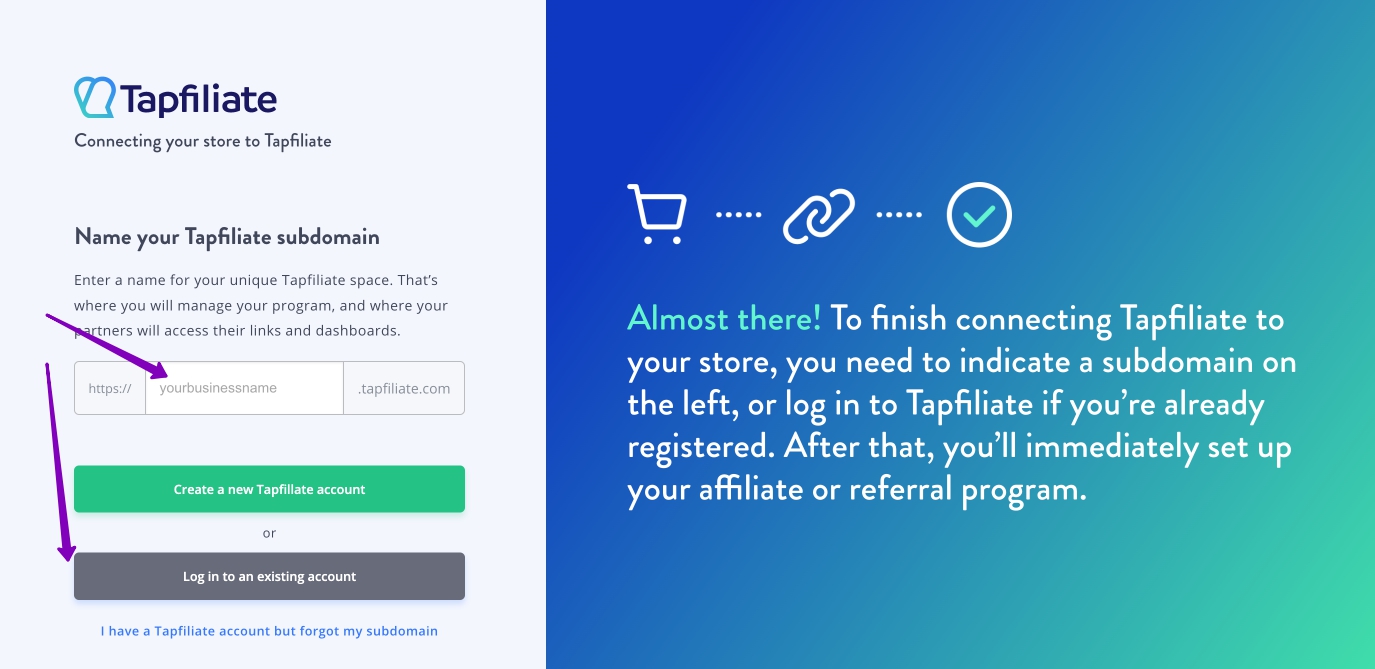


Link to existing account:
Enter your account’s subdomain (you can see it in your browser’s address bar), and click Log in to an existing account.
Important note: You can only add one Shopify shop per single Tapfiliate account. So if you have a Shopify shop already connected to Tapfiliate, you need to create a new Tapfiliate account instead of linking the old one.
Link to new account:
Select a new subdomain name for your unique Tapfiliate space, and click Create a new Tapfiliate account. Shopify will generate a payment plan for you, that you need to approve in your Shopify account admin panel. Your Tapfiliate free trial will start immediately, and you will not pay until the 14-day free trial is over.
That’s it - now you’re ready to start setting up your affiliate, referral or influencer tracking program!
Shopify code-based integration
It’s also possible to integrate Tapfiliate into your Shopify shop by manually adding the JS code. This method of integration was in use before May 2022. Although it is no longer our primary method of integration, it is still working.
Step-by-step integration guide
- In your shop’s admin environment, please go to: Log in to your shop > Open Setting > Click on Customer events > Add custom pixel > Name the pixel and press Add pixel.
- Permissions: Choose Required > Check the boxes next to Marketing and Analytics.
- Data sale: Please, choose Data collected does not qualify as data sale.
Next, in the Code section, paste the following code:
window.self = window.top;

const script = document.createElement('script');
script.setAttribute('src', 'https://script.tapfiliate.com/tapfiliate.js');
script.setAttribute('async', '');
document.head.appendChild(script);

(function(t,a,p){t.TapfiliateObject=a;t[a]=t[a]||function(){
  (t[a].q=t[a].q||[]).push(arguments)}})(window,'tap');

tap('create', 'YOUR ACCOUNT ID', { integration: "shopify" });
tap('detect');

analytics.subscribe('checkout_completed', (event) => {
  const checkout = event.data.checkout;
  const order_currency = checkout.totalPrice.currencyCode;
  const order_price = checkout.subtotalPrice.amount
  const order_id = checkout.order.id;
  const email = checkout.email;
  const discount_codes = checkout.discountApplications.map((discount) => {
if (discount.type === 'DISCOUNT_CODE') {
return discount.title;
}
  });

  tap('conversion', order_id, order_price, {
coupons: discount_codes,
currency: order_currency,
customer_id: email,
  });
});
{{{{NO_ACCOUNT_ID_SET_MESSAGE}}}}
Hit save > Press Connect, and you are all done!
Advanced use-case: Tracking multiple commission types per product category/SKU
It is now possible to distinguish different commission types in your store upon sending the conversion data. To proceed, you have to adjust your code on the Code section, as follows:
1. Create the identifiers for extra commission types in your Tapfiliate account by following our guide.
2. In your Shopify tracking code you’ve added to the Code section, add the following object: COMMISSION-TYPE-IDENTIFIER as in the example below
 tap('conversion', order_id, order_price, COMMISSION-TYPE-IDENTIFIER, {
coupons: discount_codes,
currency: order_currency,
customer_id: email,
  });
Important
Please remember to test a conversion before starting your program. This way you can verify that tracking has been set up correctly. You can create a test conversion by following the steps described here.